Hey wing lovers! Ever crave those perfectly sticky, smoky, slightly crispy BBQ chicken wings you get at your favorite joint, but made right in your own kitchen? Well, dust off that apron because we’re diving deep into making legendary homemade BBQ chicken wings. Forget complicated techniques or mystery ingredients – this recipe is all about straightforward steps delivering big, bold flavor and fall-off-the-bone tenderness with that crave-worthy crispy skin. Perfect for game day, backyard hangs, or just because it’s Tuesday! Let’s get saucy.
Click here to unlock your metabolic power
1. Why These Wings Will Steal the Show
Imagine this: tender, juicy chicken wings coated in a smoky-sweet, tangy BBQ glaze that caramelizes beautifully in the oven (or grill!). The skin? Crispy, not soggy. The flavor? Deep, complex, and utterly addictive. These wings are the ultimate crowd-pleaser because they hit all the right notes: sweet, savory, tangy, smoky, and just a little spicy if you want. Plus, making them at home means you control the ingredients, the heat level, and the pride that comes with serving something truly delicious. Get ready for compliments!
Click here to unlock your metabolic power
2. The Shopping List: Gather Your Wing Warriors
(Makes about 3-4 servings, roughly 2-3 lbs of wings)
- The Star:
- 2.5 – 3 lbs Chicken Wings (Look for “party wings” already split into drumettes and flats, or whole wings you’ll separate. Fresh is best, but thawed frozen works fine. Pat them very dry!)
- The Flavor Foundation (Dry Rub):
- 1 tbsp Brown Sugar (Light or dark, packed)
- 1.5 tsp Smoked Paprika (This is KEY for that BBQ vibe! Regular paprika works in a pinch but lacks the depth.)
- 1 tsp Garlic Powder
- 1 tsp Onion Powder
- 1 tsp Salt (Kosher salt or sea salt is ideal)
- 1/2 tsp Black Pepper (Freshly ground if possible)
- 1/2 tsp Chili Powder (Mild or medium – adjust heat later!)
- (Optional Pinch): 1/4 tsp Cayenne Pepper (For a kick! Add more later to the sauce if you like heat.)
- The Glorious Glaze (BBQ Sauce):
- 1 cup Your Favorite BBQ Sauce (Choose a good quality one! Brands like Sweet Baby Ray’s, Stubb’s, or Bull’s-Eye Original are reliable starters. Homemade is amazing too if you’re feeling ambitious!)
- 2 tbsp Apple Cider Vinegar (Adds tang and helps thin the sauce slightly)
- 1 tbsp Honey or Maple Syrup (For extra shine and sweetness)
- 1 tbsp Unsalted Butter, melted (Adds richness and helps the sauce cling)
- 1 tsp Worcestershire Sauce (That umami depth!)
- (Optional Heat Boost): 1/2 – 1 tsp Hot Sauce (Like Frank’s RedHot or your fav)
- The Practical Stuff:
- Baking Sheet (Rimmed, aka a “jelly roll pan”)
- Wire Rack (That fits inside your baking sheet – CRITICAL for crispy skin!)
- Aluminum Foil (For easy cleanup)
- Large Mixing Bowls (One for wings, one for sauce)
- Tongs
- Pastry Brush (Or spoon for saucing)
- Paper Towels (For drying wings)
Click here to unlock your metabolic power
3. Prep School: Getting Your Wings Ready for Stardom
- Dry is Key! Unwrap those wings and pat them bone-dry with paper towels. Seriously, get rid of as much moisture as possible. This is the secret handshake for crispy skin. Discard the paper towels.
- Separate (If Needed): If you bought whole wings, carefully cut through the joints to separate them into drumettes (the mini drumsticks), flats (the two-boned middle part), and wingtips. Save the wingtips for stock or discard them – they don’t crisp up well for this.
- Spice Up Your Life (Dry Rub): In a small bowl, mix together all the dry rub ingredients: brown sugar, smoked paprika, garlic powder, onion powder, salt, black pepper, chili powder, and cayenne (if using). Stir it really well.
- Rub-a-Dub-Dub! Place the thoroughly dried wings in a large mixing bowl. Sprinkle the dry rub evenly over them. Now, get your hands in there! Massage that rub into every nook and cranny of the wings. Make sure they’re evenly coated. Think of it as a flavor massage!
- Chill Out (Optional but Recommended): For even more flavor penetration and slightly drier skin (crispier!), cover the bowl and pop it in the fridge for at least 30 minutes, or up to 4 hours. If you’re short on time, you can skip this, but it helps!
4. Cooking Magic: Baking to Crispy, Saucy Perfection
- Preheat & Prep Pan: Preheat your oven to 250°F (120°C). Line your rimmed baking sheet with aluminum foil (hello, easy cleanup!). Place the wire rack on top of the foil-lined sheet. Give the rack a quick spray with cooking spray to prevent sticking.
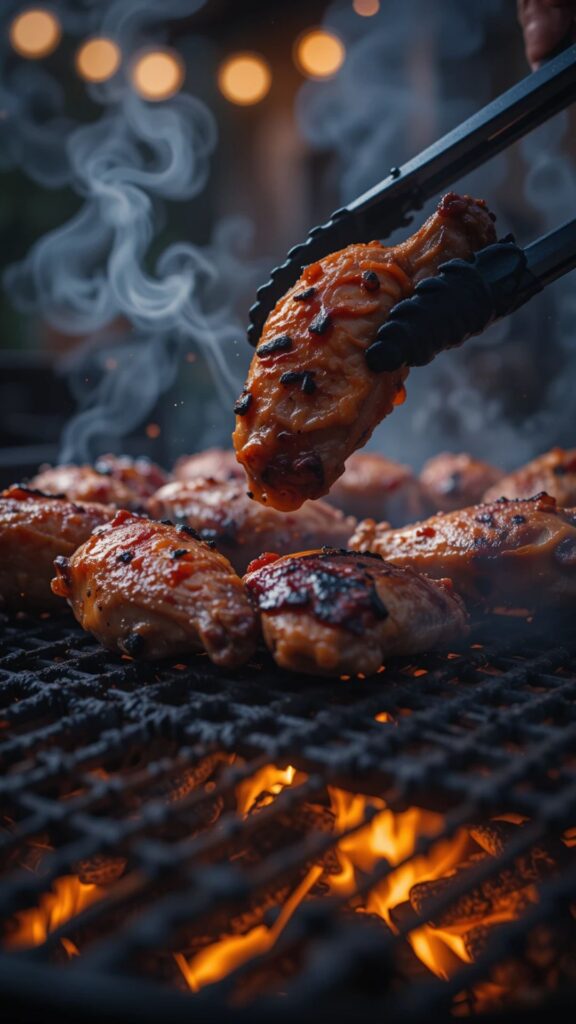
- Arrange & Slow Bake: Arrange the seasoned wings in a single layer on the wire rack, skin-side up. Don’t crowd them! Bake on the middle rack for 30 minutes. This low and slow start gently cooks the meat and begins rendering fat.
- Crank Up the Heat! After 30 minutes, increase the oven temperature to 425°F (220°C). Bake for another 40-50 minutes. Keep an eye on them! The wings are done when the skin is deeply golden brown, crispy, and the internal temperature reaches 165°F (74°C) when checked with a meat thermometer in the thickest part of the drumette (avoiding the bone). The time can vary slightly depending on your oven and wing size.
- Sauce Simmer: While the wings bake, make the glaze. In a medium saucepan (or microwave-safe bowl), combine the BBQ sauce, apple cider vinegar, honey/maple syrup, melted butter, Worcestershire sauce, and hot sauce (if using). Heat over low heat on the stovetop (or microwave in 30-sec bursts), stirring occasionally, until it’s warm, smooth, and slightly thickened (about 5 mins). Don’t let it boil hard. Remove from heat.
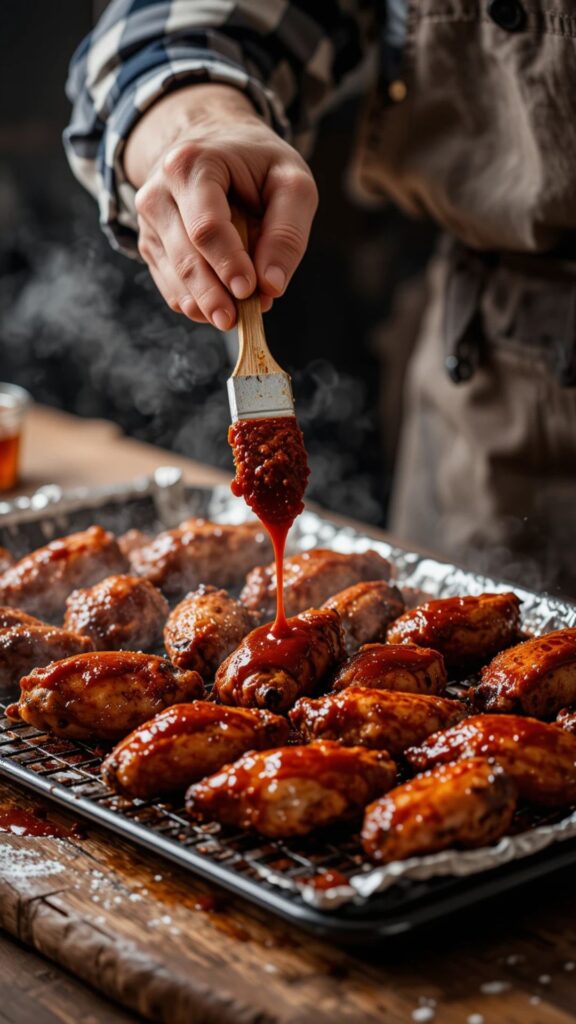
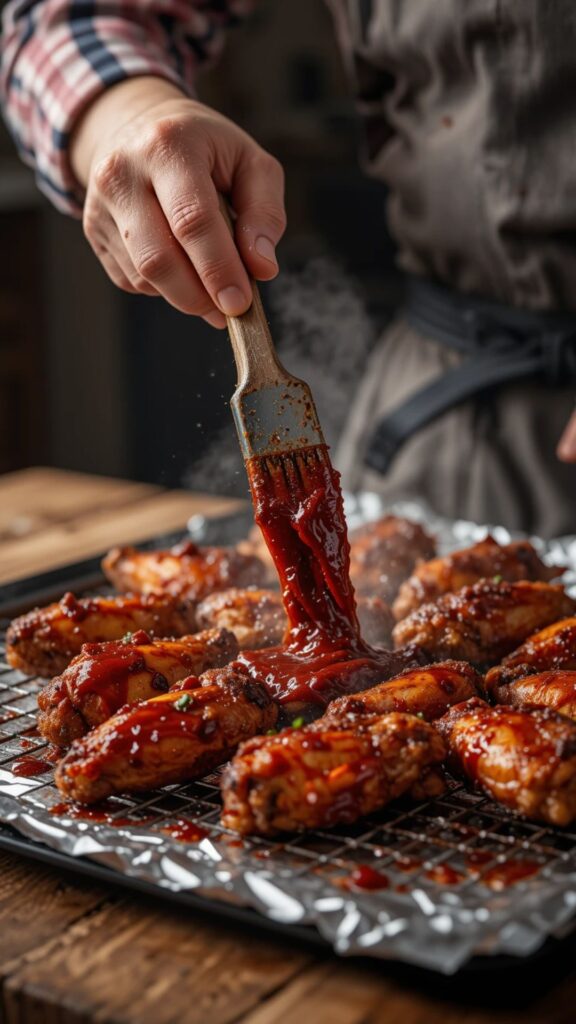
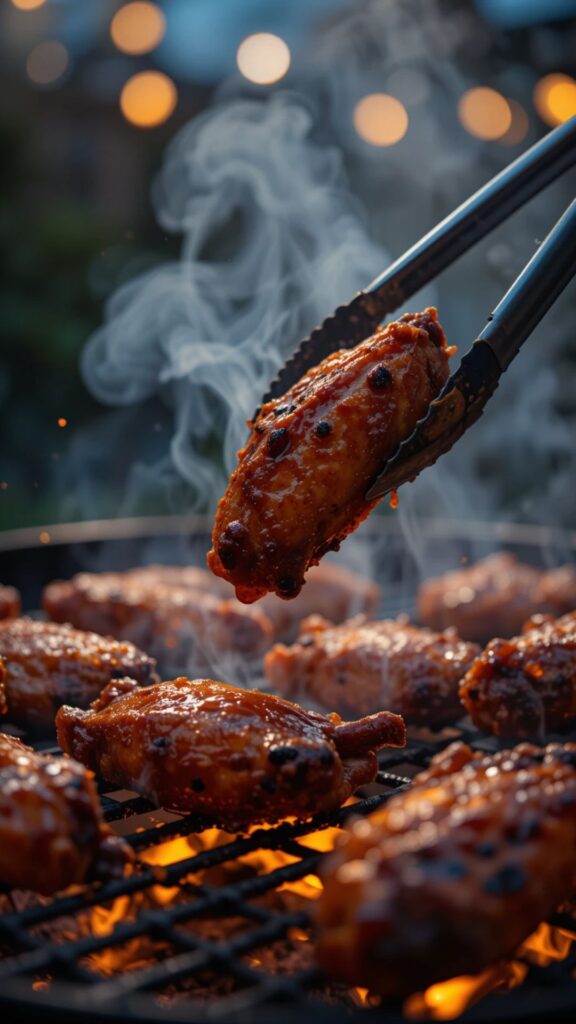
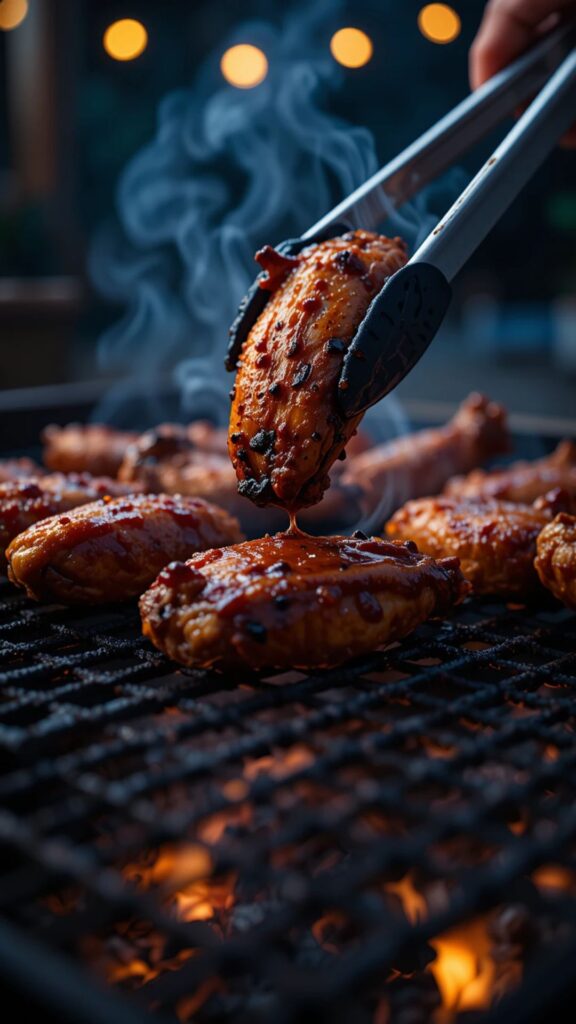
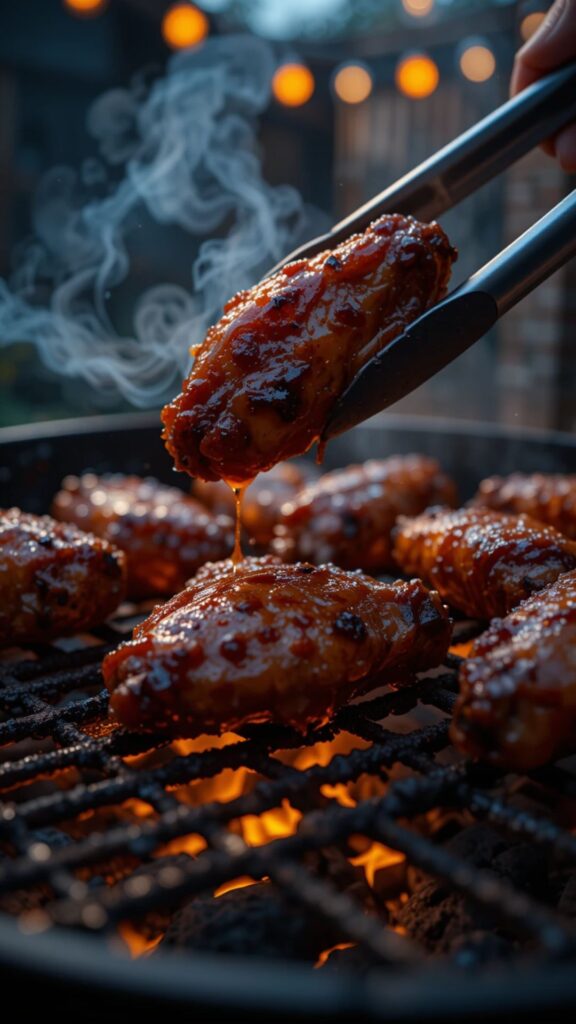
- The Saucy Finale (CRITICAL STEP!): Once the wings are crispy and cooked through, carefully remove the pan from the oven. Increase your oven to BROIL (High setting). Working quickly, use tongs to dip each wing into the warm BBQ sauce, coating it generously but letting excess drip off. Place it back on the wire rack. Repeat with all wings. Alternatively, you can brush the sauce heavily onto the wings while they’re on the rack.
- Broil for Brilliance: Place the sauced wings back under the broiler, about 6 inches from the heat source. WATCH THEM LIKE A HAWK! Broil for 2-4 minutes MAX, just until the sauce starts to bubble, caramelize, and get those gorgeous sticky edges. Rotate the pan if needed for even browning. This happens FAST – don’t walk away or they’ll burn!
- Rest & Set: Remove the wings immediately and let them rest on the rack for about 5 minutes. This allows the glaze to set slightly so it doesn’t just slide off when you pick them up.
Click here to unlock your metabolic power
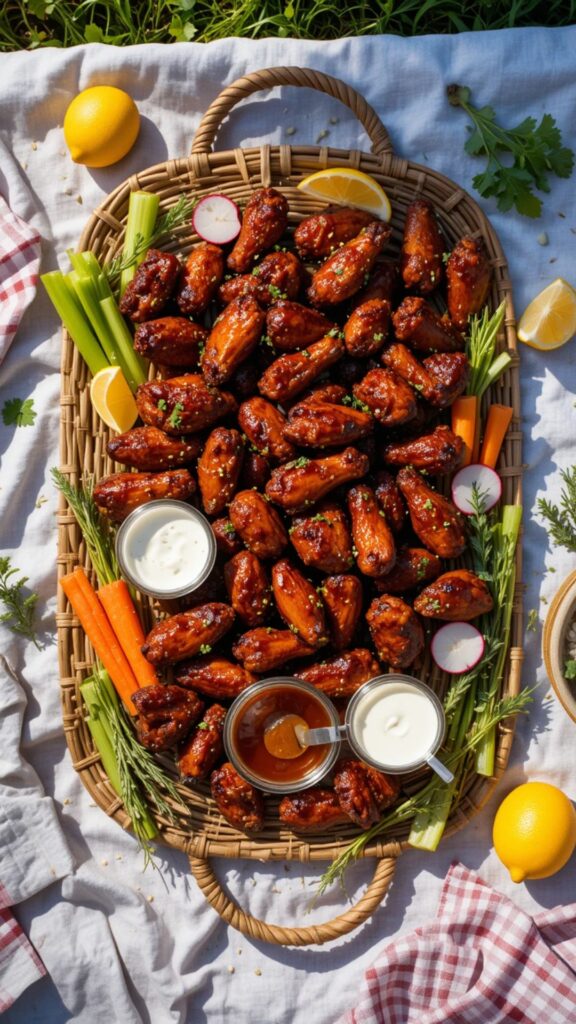
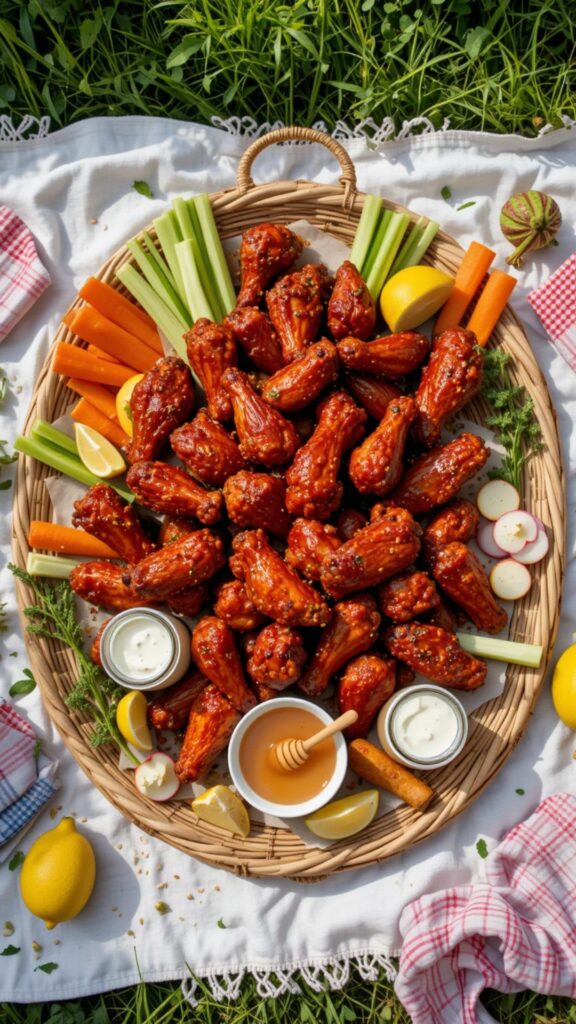
5. Serving Up the Glory: How to Present Your Masterpiece
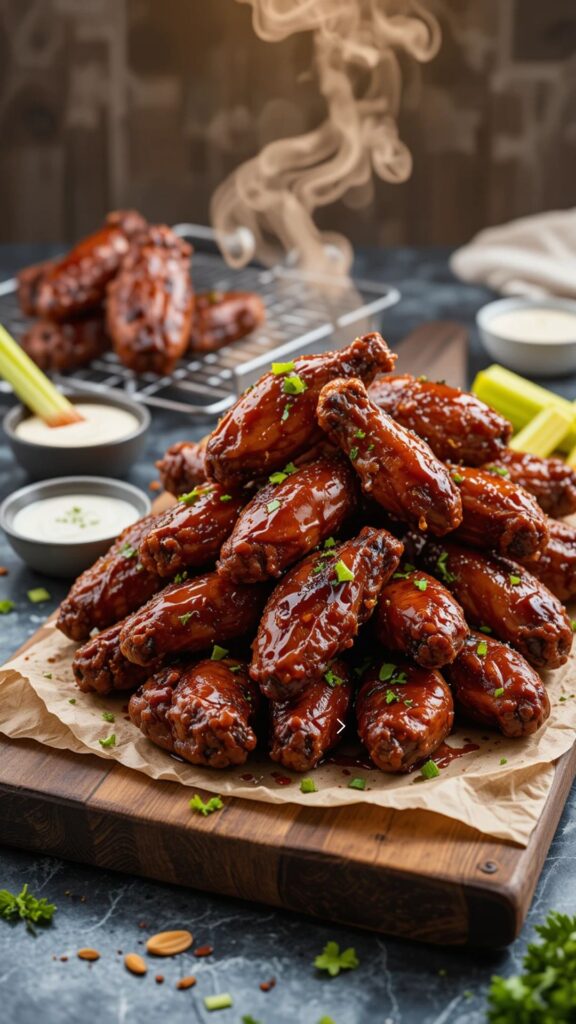
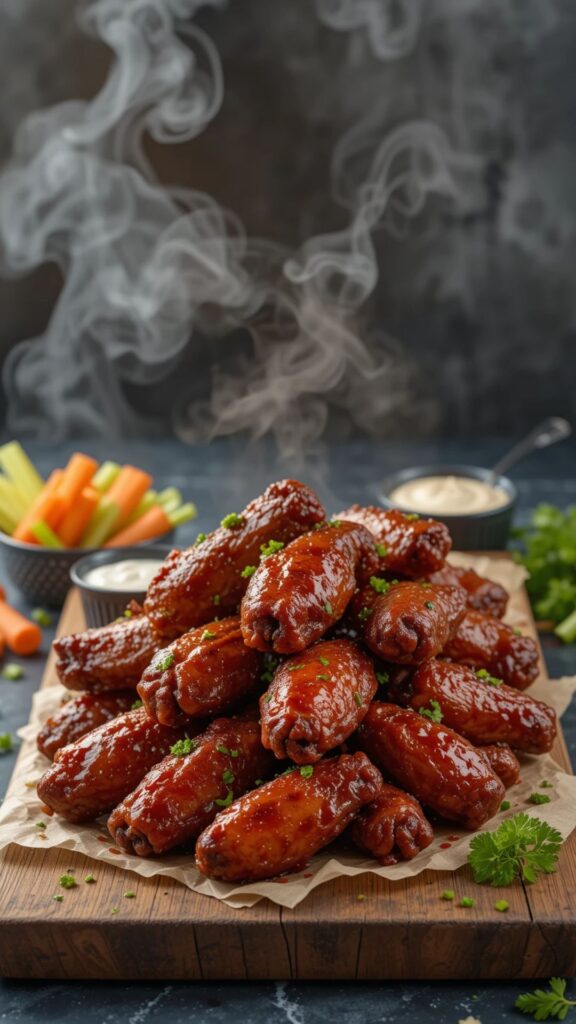
- Pile ‘Em High! Transfer those gorgeous, sticky wings to a large serving platter. A rustic wooden board or a simple big plate works great.
- Garnish (Optional but Nice): Sprinkle with some finely chopped fresh parsley or cilantro for a pop of green. Thinly sliced green onions (scallions) also look and taste great.
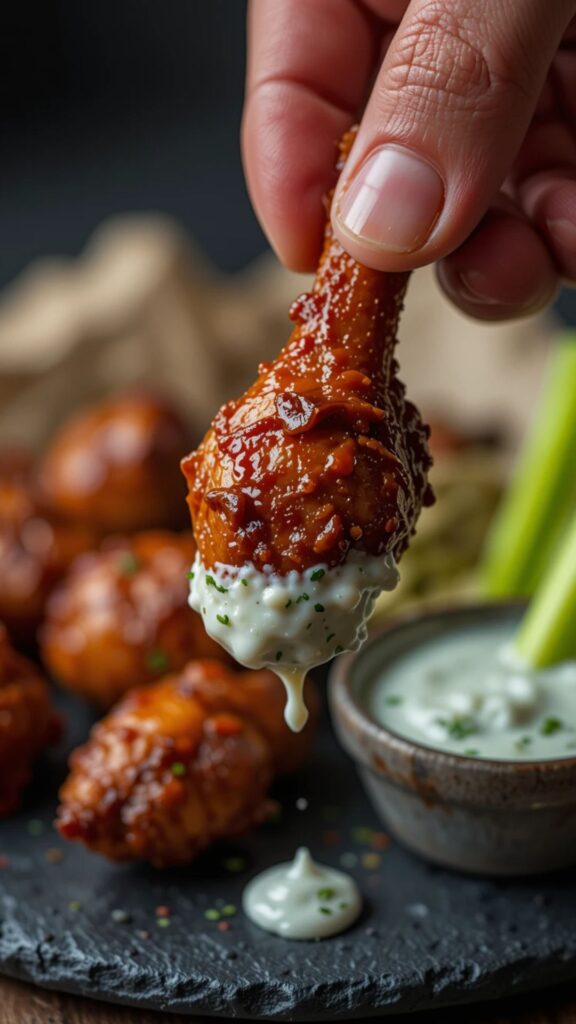
- Dipping Duo: Serve with classic cooling dips on the side. Chunky Blue Cheese Dressing is the traditional wingman. Ranch Dressing is always a crowd-pleaser. Offer both!
- Veggie Refresh: Add some crunchy celery sticks and carrot sticks to the platter. They cut through the richness perfectly.
- Napkin Alert! Seriously, put out lots of napkins. These are gloriously messy!
6. Pro Tips & Tweaks: Level Up Your Wing Game
- Crispier Skin Guarantee: After patting dry in step 1, toss the wings with 1 teaspoon of baking powder (NOT soda!) mixed into the dry rub. This works wonders by raising the skin’s pH, helping it get extra crispy. Omit the salt in the rub if you do this and just salt lightly after baking.
- Smoky Flavor Boost (No Smoker!): Add 1/2 teaspoon liquid smoke to the BBQ sauce glaze. Use sparingly!
- Heat Lovers: Double the cayenne in the rub AND add extra hot sauce (or even a pinch of cayenne) to the BBQ glaze. Offer hot sauce on the side.
- Sweet Tooth? Add an extra tablespoon of honey or brown sugar to the BBQ glaze.
- Tangier? Add another tablespoon of apple cider vinegar to the glaze.
- Grill Option: After the initial low bake (step 2), finish the wings on a preheated medium-high grill (375-400°F) for 5-7 minutes per side until crispy and charred in spots. Then sauce and broil briefly (or grill for 1-2 more mins per side, watching closely).
- Air Fryer Hack: Pat wings VERY dry, toss with rub (and optional baking powder). Cook at 380°F (195°C) for 20-25 mins, shaking basket halfway. Increase to 400°F (200°C) for 5-10 mins until super crispy. Toss in warm sauce.
- Dietary Tweaks:
- Gluten-Free: Ensure your BBQ sauce and Worcestershire sauce are certified GF (many are, but check!).
- Lower Sugar: Use a low-sugar/no-sugar BBQ sauce and skip the added honey/syrup in the glaze. Lean into the vinegar and spices.
- Dairy-Free: Skip the butter in the glaze. Use a neutral oil like avocado oil instead (1 tsp).
Click here to unlock your metabolic power
7. Wrap-Up: Your Wing Journey Complete!
So there you have it! From patting those wings dry to that final glorious broil, you’ve got the roadmap to incredible homemade BBQ chicken wings. It’s a simple process – dry, season, slow bake, crisp up, sauce, caramelize – but the payoff is huge. Juicy meat, crispy skin, and that finger-licking, sticky-sweet-smoky sauce. It’s pure comfort food magic.
Fun Fact: While chicken wings have been around forever, the concept of Buffalo wings (deep-fried and coated in hot sauce) was famously invented in 1964 at the Anchor Bar in Buffalo, New York. BBQ wings are a delicious evolution of that iconic bar snack, bringing smoky sweetness to the party! Now your kitchen is the hotspot.
Go forth and conquer wing night! Invite some friends, crank up the tunes, and get ready for the compliments to roll in. You’ve earned it!

Nutritional Breakdown (Approximate per serving – 1/3rd of recipe, about 6-8 wings):
- Calories: 550-700 kcal (Varies greatly based on sauce, skin eaten, etc.)
- Total Fat: 35-45g
- Saturated Fat: 10-15g
- Cholesterol: 150-200mg
- Sodium: 900-1400mg (Sauce is the main contributor – check your brand!)
- Total Carbohydrates: 25-40g
- Dietary Fiber: 0-1g
- Sugars: 20-35g (Mostly from sauce/rub)
- Protein: 35-45g
Remember: This is an estimate. Values change significantly based on the specific BBQ sauce used, how much sauce clings, and the exact size/fat content of the wings. It’s indulgent comfort food – enjoy mindfully!

BBQ Chicken Wings FAQ: Your Burning Questions Answered!
- Q: Can I use frozen wings?
A: Absolutely! Thaw them completely in the fridge overnight first. Crucially, pat them EXTRA dry – frozen wings release more moisture. - Q: Why the wire rack? Can I just bake them on the pan?
A: The rack is non-negotiable for crispy skin! It allows hot air to circulate all around the wings, letting fat drip away. Baking directly on the pan steams the bottom, making it soggy. Trust me on this one! - Q: My wings aren’t crispy enough! What went wrong?
A: The usual culprits:- Not dried enough: Pat, pat, pat!
- Skipped the rack: See above!
- Crowded the pan: Wings need space for air flow.
- Sauced too early: Only sauce after they are fully cooked and crispy, just before the final broil.
- Oven temp too low during crisping phase: Make sure it hits 425°F.
- Q: Can I make these ahead of time?
A: You can prep the wings with the dry rub up to 4 hours ahead (keep covered in the fridge). Cook them fully (steps 2 & 3) about 1 hour before serving. Let them cool slightly, then sauce and broil right before serving for maximum crisp and freshness. Fully cooked unsauced wings keep well refrigerated for 2 days – reheat on the wire rack at 400°F until hot and crisp, then sauce and broil. - Q: How do I reheat leftovers?
A: To keep them crispy, avoid the microwave! Reheat on a wire rack set over a baking sheet in a 375°F (190°C) oven for 10-15 minutes, or until hot through. An air fryer at 375°F for 5-8 minutes works great too! - Q: Can I use boneless chicken breasts or thighs instead?
A: You can use the BBQ sauce and similar method, but the cooking times and techniques will be different! Boneless pieces won’t get the same crispy skin effect. Aim for an internal temp of 165°F. Thighs are juicier than breasts. - Q: My BBQ sauce is too thick for glazing. Help!
A: Thin it out! Add a splash of water, apple cider vinegar, apple juice, or even a little chicken broth (1 tsp at a time) to the warm sauce until it reaches a brushable consistency.
Click here to unlock your metabolic power
Now you’re truly armed with all the wing wisdom! Go get cooking and enjoy those crispy, saucy bites of heaven. Let me know how your wing adventure goes!