1. Introduction
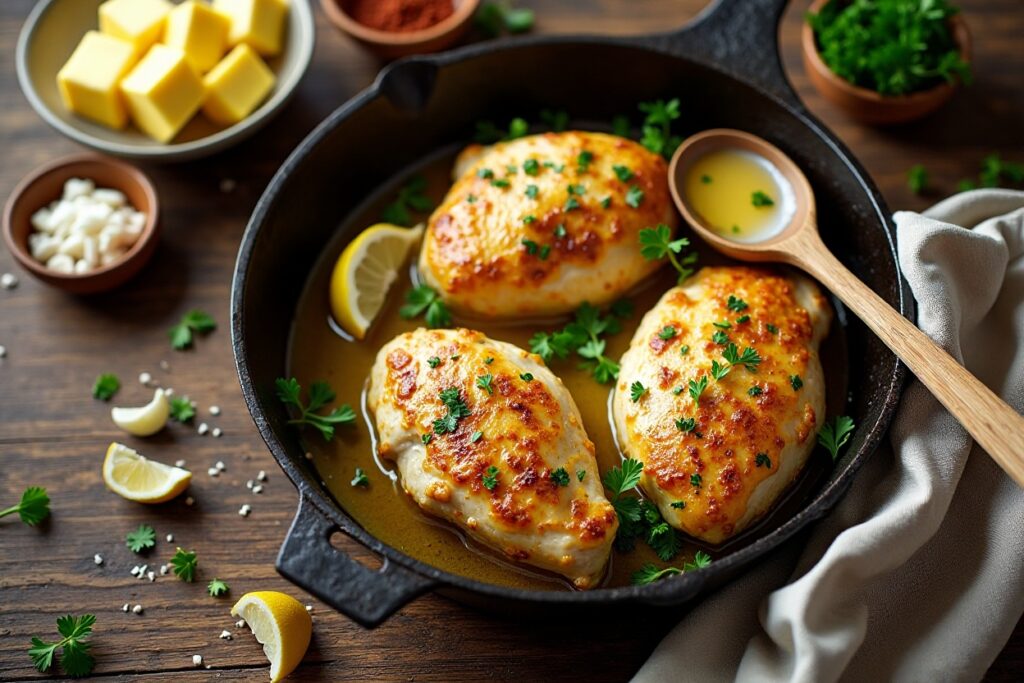
If you’re after a weeknight meal that tastes indulgent but comes together super fast, this skillet garlic butter chicken is your hero. You’re cooking juicy chicken in one pan, blanketed in a rich garlic-butter sauce that hits all the comfort-food notes. It’s classy enough for company, cozy enough for a solo dinner—and most of the work takes less than 15 minutes.
Why it works: The garlic + butter combo gives big flavour, the skillet method keeps things quick and clean, and you get chicken that’s tender rather than dried out. This recipe plays nicely with sides (rice, pasta, veggies) and adapts easily if you want to tweak for lower carb, gluten-free, etc.
2. Ingredients
Here’s what you’ll need (serves about 2–3 people). I’ll also mention types/brands you can look for (feel free to swap out locally available Indian brands).
2 boneless, skinless chicken breasts (about 250-300 g each)
½ teaspoon freshly ground black pepper
½ teaspoon garlic powder (optional, for extra garlic kick)
¼ cup (≈30 g) all-purpose flour (for light dredge) – you can use a gluten-free flour if desired
2 tablespoons extra-virgin olive oil (for pan-frying)
1 tablespoon unsalted butter (room-temperature)
For the sauce:
6 cloves fresh garlic, finely minced (choose fresh: more flavour)
6 tablespoons (≈85 g) unsalted butter (rich flavour)
1 tablespoon chopped fresh parsley (or 1 teaspoon dried parsley)
½ cup (≈120 ml) dry white wine or substitute ½ cup low-sodium chicken broth if you prefer no alcohol
1 teaspoon garlic powder (optional)
Optional extras (for variation):
A pinch of red pepper flakes (if you like it spicy)
A squeeze of fresh lemon juice at the end (for brightness)
A handful of baby spinach or halved cherry tomatoes (to turn it into a one-skillet veggie-boosted dish)
3. Essential Kitchen Tools & Appliances
Before you start cooking, make sure you’ve got:
A sharp kitchen knife (for trimming and slicing the chicken, chopping garlic/parsley)
Paper towels (to pat dry the chicken)
A shallow dish or plate (to dredge the flour)
A heavy skillet or frying pan (ideally non-stick or well-seasoned cast iron)
A spatula or tongs (to turn the chicken)
A whisk (for the sauce)
Measuring spoons and measuring cups (for accuracy)
A small bowl (to mix/hold parsley, garlic powder, etc)
A lid or foil tent (to rest the chicken if needed)
Optional: A meat thermometer (to check doneness if you like precision)
4. Preparation Steps
- Remove the chicken breasts from the fridge about 10 min ahead so they warm slightly—this helps even cooking.
- Pat the chicken dry with paper towels (moisture = steam = less golden crust).
- On the cutting board, check if chicken breasts are uneven in thickness. If the thicker end is much bulkier, you can halve horizontally (butterfly) or gently flatten with a meat mallet (or heavy pan bottom) so they cook evenly.
- Season both sides of each chicken piece with salt, pepper, garlic powder.
- Place the flour in a shallow dish. Dredge each chicken piece lightly in flour—shake off excess. This will help give a light crust and help the sauce adhere.
- Mince the garlic cloves, chop parsley, and set aside. Measure out the butter for the sauce.
- If using wine, measure it now; if substituting broth, have that ready.
5. Cooking Instructions
Here’s how you make it come together in about 15 minutes:
- Place the skillet over medium-high heat. Add olive oil. When the oil is shimmering (but not smoking), add the tablespoon of butter and swirl to melt.
- Add the prepared chicken pieces to the pan. Cook for about 3–4 minutes on the first side until golden brown. Then flip using tongs and cook another 2–3 minutes until the second side is golden and the chicken is almost cooked through. (If you have a meat thermometer, you’re aiming for ~74 °C / 165 °F internal temp.)
- Remove the chicken from the skillet and place it on a plate; tent loosely with foil to keep warm.
- Reduce heat to medium. In the same skillet, add the white wine (or chicken broth). Use a wooden spoon or spatula to scrape up any browned bits from the pan bottom (that’s flavour!). Let the liquid reduce for about 1 minute.
- Then add the minced garlic, the 6 tbsp butter, parsley, garlic powder (if using), salt, and pepper. Whisk gently using a whisk as the butter melts and the sauce comes together. This should take ~1–2 minutes. Tip: Don’t let the butter burn—if it starts browning too fast reduce heat slightly.
- Return the chicken pieces into the skillet, spooning the sauce over them. Let them sit in the sauce for ~30 seconds so they soak up flavour. Then turn off heat.
- Optional: Squeeze fresh lemon juice over the chicken for a bright finish, add red pepper flakes for heat, or toss in spinach / cherry tomatoes and stir to wilt.
- Serve immediately.
6. Serving Suggestions
- Place each chicken breast on a warm plate, spoon generous garlic-butter sauce over the top.
- Garnish with extra chopped parsley (fresh colour), maybe a thin lemon slice on the side for brightness.
- Good side pairings:
- Steamed basmati or jasmine rice (to soak up sauce)
- Buttered pasta (spaghetti or fettuccine) with perhaps a sprinkle of Parmesan
- Roasted vegetables (like asparagus, broccoli, or green beans)
- A crisp garden salad with vinaigrette (for contrast to the rich sauce)
- For plating at your food/recipe site: show the glistening sauce, a slice of lemon, maybe a garnish of micro-greens or parsley for that fresh appeal.
7. Additional Tips & Tweaks
- For extra flavour: After you remove chicken, you can toss in a small shallot finely diced with garlic before adding the wine/broth—adds sweet oniony depth.
- For a crustier exterior: After dredging in flour, you could also dust very lightly with paprika or smoked paprika for colour + mild smokiness.
- Healthier tweaks:
- Use half butter + half olive oil in the sauce to reduce saturated fat.
- Swap regular flour for almond flour (if gluten-free).
- Serve over cauliflower rice instead of regular rice for lower carbs.
- Dietary adaptations:
- To make it dairy-free: use vegan butter or ghee, but still a rich buttery flavour.
- To make it lower-sodium: use unsalted butter, low-sodium broth, and taste before adding salt.
- To make it spicy: add crushed red pepper flakes or a dash of cayenne when cooking the sauce.
- Cooking tip: Because you cook chicken quickly, thickness matters—flattening or butterflying helps avoid overcooking. Also don’t crowd the pan, or the chicken will steam rather than sear.
- Let the chicken rest for a minute after cooking (even though it’s quick) so the juices redistribute and it stays moist.
8. Nutrition Details
Here’s an estimated nutrition breakdown per serving (assuming the recipe serves 3). Note: these are estimates.
| Nutrient | Per Serving |
|---|---|
| Calories | ~ 350 kcal |
| Protein | ~ 30 g |
| Total Carbohydrates | ~ 5-6 g |
| Dietary Fiber | ~ 0.5-1 g |
| Sugars | ~ 1 g |
| Total Fat | ~ 22-24 g |
| Saturated Fat | ~ 10-12 g |
| Sodium | ~ 600-700 mg* |
*Depending on how much salt/butter/broth you use, sodium may vary.
These figures align roughly with registered nutrition for garlic butter chicken in other sources (~470 kcal for a ~235 g portion with ~35 g fat) (SnapCalorie)
9. FAQ Section
Q: Can I store leftovers?
A: Yes—cool remaining chicken, cover and refrigerate in an airtight container for up to 2 days. Reheat gently in a skillet on low heat, add a splash of water or broth to loosen the sauce so it doesn’t dry out.
Q: Can I use chicken thighs instead of breasts?
A: Absolutely. Thighs are more forgiving (juicier) but may need a minute or two more cooking time. Ensure they reach safe internal temp (~74 °C).
Q: What if I don’t have white wine?
A: No problem—use low-sodium chicken broth instead; it still gives flavour and deglazing action.
Q: How can I make it gluten-free?
A: Skip the flour dredge or substitute with almond flour or gluten-free flour blend. The coating is light anyway.
Q: I don’t have fresh parsley—can I use dried?
A: Yes—use about 1 teaspoon dried parsley instead of 1 tablespoon fresh. But fresh gives better colour and a brighter flavour.
10. Wrap-Up
So there you have it: a simple, flavour-packed recipe for Skillet Garlic Butter Chicken that comes together in around 15 minutes and delivers big taste. Whether it’s a weeknight win or a quick dinner for guests, this one has you covered. And fun fact: garlic-butter sauce has been a classic flavor combo in European kitchens for decades, but the skillet method gives it that modern, efficient twist (no oven needed).
Enjoy cooking, and let me know how it turns out (and if you want a vegetarian version next time!).