
Introduction
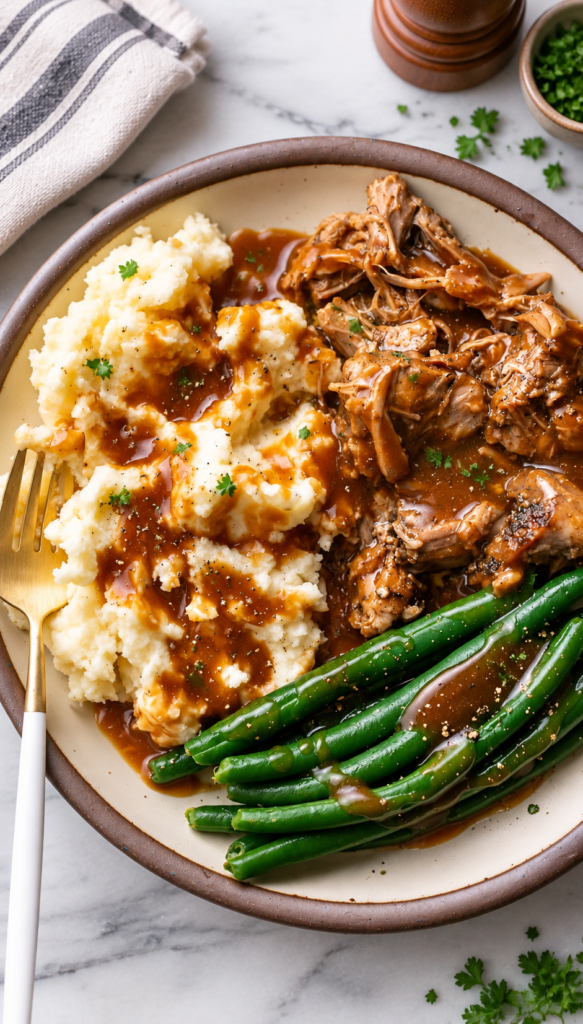
Okay, real talk: this is the kind of recipe that makes people think you spent all day slaving in the kitchen, when really the oven did most of the work. A Dutch oven pork roast is exactly what it sounds like — a big, juicy hunk of pork shoulder (or loin, depending on your mood), seared until it’s got that gorgeous golden crust, then slow-braised in a heavy pot with veggies, broth, and aromatics until it’s so tender it practically falls apart when you look at it funny.
What makes this dish a total winner is the sheer ease of it. One pot. Minimal babysitting. And the payoff is huge — a Sunday-dinner-worthy roast with rich, savory gravy built right in. It’s comfort food at its finest, perfect for chilly evenings, holiday tables, or honestly just a random Tuesday when you want to feel like you’ve got your life together.
Ingredients
Here’s your shopping list. I’ve kept the measurements exact so you’re not guessing, and thrown in a few brand notes for the stuff where quality actually makes a difference.
- 3 to 4 lb boneless pork shoulder (or pork loin roast) — look for one with a decent fat cap; it bastes the meat as it cooks
- 2 tablespoons olive oil (a good extra-virgin one, like Colavita or California Olive Ranch, gives a nicer sear flavor)
- 1 ½ teaspoons kosher salt (Diamond Crystal or Morton both work, just don’t swap volumes 1:1 — they’re different densities)
- 1 teaspoon black pepper, freshly ground if you can
- 1 tablespoon smoked paprika
- 1 teaspoon garlic powder
- 1 teaspoon onion powder
- 1 large yellow onion, roughly chopped
- 4 cloves garlic, smashed
- 3 medium carrots, cut into big chunks
- 3 celery stalks, cut into big chunks
- 1 ½ lbs baby potatoes, halved (Yukon gold hold their shape nicely here)
- 1 cup chicken broth (low-sodium, like Swanson or Kitchen Basics, so you can control the salt)
- ½ cup dry white wine (optional, but it adds a nice tang — a cheap Pinot Grigio is fine)
- 2 tablespoons apple cider vinegar
- 2 tablespoons brown sugar
- 2 sprigs fresh rosemary (or 1 teaspoon dried)
- 2 sprigs fresh thyme (or 1 teaspoon dried)
- 2 bay leaves
- 2 tablespoons cornstarch mixed with 2 tablespoons cold water (for thickening the gravy at the end, if you want it thicker)
Essential Kitchen Tools & Appliances
Get these lined up before you start so you’re not scrambling mid-recipe:
- A 5- to 7-quart enameled Dutch oven (Lodge and Le Creuset are the go-to names here — Lodge is the budget-friendly workhorse, Le Creuset is the splurge that lasts forever)
- A sturdy cutting board
- A sharp chef’s knife
- Tongs for flipping and moving that heavy roast around safely
- A meat thermometer — this is non-negotiable if you want perfectly cooked pork every time
- Measuring cups and measuring spoons
- A small mixing bowl for the cornstarch slurry
- Oven mitts (thick ones — that Dutch oven lid gets seriously hot)
Cooking Timing and Preparation Steps
Let’s get everything prepped so the actual cooking part goes smoothly.
- Pull the pork out of the fridge 30 minutes before cooking. Letting it come closer to room temperature helps it sear more evenly.
- Pat the pork completely dry with paper towels. This step matters more than you’d think — a wet surface won’t brown properly.
- Mix your dry rub: combine the smoked paprika, garlic powder, onion powder, salt, and pepper in a small bowl.
- Rub the seasoning all over the pork, pressing it in on every side.
- Chop your vegetables: onion, carrots, celery, and potatoes, keeping them in fairly large chunks so they hold up during the long braise.
- Smash your garlic cloves with the flat side of your knife — no need to mince, they’ll soften into the sauce.
- Preheat your oven to 325°F (163°C).
- Set the Dutch oven over medium-high heat on the stovetop and add the olive oil, letting it heat until it shimmers.
Cooking/Baking Instructions
Now for the fun part.
- Sear the pork. Place it in the hot Dutch oven and sear for 3 to 4 minutes per side, until you’ve got a deep golden-brown crust all around. Don’t rush this — it’s where a lot of the flavor comes from. Remove the pork and set it aside on a plate.
- Sauté the aromatics. In the same pot (don’t wipe out those browned bits — that’s flavor gold), toss in the onion, carrots, and celery. Cook for about 5 minutes, stirring occasionally, until the onion softens. Add the smashed garlic and cook for another minute.
- Deglaze. Pour in the white wine (if using) and scrape up all those browned bits stuck to the bottom of the pot with a wooden spoon.
- Build the braising liquid. Stir in the chicken broth, apple cider vinegar, and brown sugar. Nestle the pork back into the pot, along with any juices that collected on the plate.
- Add the herbs. Tuck in the rosemary, thyme, and bay leaves around the pork.
- Cover and transfer to the oven. Put the lid on and slide the pot into your preheated oven.
- Braise for 2 hours, then add the halved potatoes around the pork.
- Continue cooking for another 45 minutes to 1 hour, until the pork reaches an internal temperature of at least 195°F (90°C) for that classic fall-apart texture, and the potatoes are fork-tender.
- Rest the meat. Pull the pot out and let the pork rest for 10 to 15 minutes before shredding or slicing — this keeps all the juices locked in instead of running out onto the cutting board.
- Thicken the gravy (optional). If you want a thicker sauce, place the pot back on the stovetop over medium heat, stir in the cornstarch slurry, and simmer for 2 to 3 minutes until it thickens up.
Secret tip: Don’t skip the sear. It’s tempting to just dump everything in the pot and call it a day, but that crust is doing serious heavy lifting for the final flavor. Also, resist the urge to peek constantly while it braises — every time you lift that lid, you’re letting heat escape and slowing down the cooking.
Serving Suggestions
Slice or shred the pork and arrange it on a big platter with the carrots, potatoes, and onions scattered around it. Spoon that rich gravy generously over the top. A sprinkle of fresh chopped parsley or a few extra rosemary sprigs on top makes it look like it belongs on a magazine cover.
As for sides — honestly, this dish is basically a full meal on its own thanks to the veggies, but a simple green salad, crusty bread for mopping up the gravy, or some buttered green beans round it out beautifully.
Additional Tips
- Make it low-carb: Swap the potatoes for cauliflower florets or turnips.
- Add a flavor boost: A splash of Worcestershire sauce or a spoonful of Dijon mustard in the braising liquid adds an extra layer of savory depth.
- Gluten-free? This recipe is naturally gluten-free as written — just double-check your broth and Worcestershire sauce labels.
- Slow cooker version: Sear the pork on the stovetop as directed, then transfer everything to a slow cooker on low for 7 to 8 hours instead of using the oven.
- Leftover magic: Shredded leftovers make incredible sandwiches, tacos, or a topping for creamy polenta.
Nutrition Details
Approximate values per serving (based on 8 servings):
| Nutrient | Amount |
|---|---|
| Calories | 420 kcal |
| Protein | 34 g |
| Carbohydrates | 22 g |
| Fat | 21 g |
| Saturated Fat | 6 g |
| Fiber | 3 g |
| Sugar | 6 g |
| Sodium | 480 mg |
Note: Nutrition values are estimates and will vary based on exact cuts of meat, brands used, and portion sizes.
FAQ Section
Can I use pork loin instead of pork shoulder? Yes, but keep in mind pork loin is leaner and cooks faster, so check for doneness earlier (around 145°F/63°C internal temp) to avoid drying it out.
How do I store leftovers? Keep them in an airtight container in the fridge for up to 4 days, or freeze for up to 3 months. Reheat gently with a splash of broth to keep it moist.
Can I make this ahead of time? Absolutely — this roast actually tastes even better the next day once the flavors have had time to meld. Just reheat covered in the oven at 300°F until warmed through.
What if I don’t have a Dutch oven? A deep oven-safe pot with a tight-fitting lid works too. If you don’t have anything oven-safe, sear and simmer everything on the stovetop over low heat instead.
How can I make it healthier? Trim excess fat from the pork before searing, use low-sodium broth, and load up on extra vegetables like mushrooms or green beans.
Wrap-Up
And there you have it — a Dutch oven pork roast that’s equal parts effortless and impressive. It’s the kind of dish that turns a regular dinner into an occasion, with almost all the work happening quietly in the oven while you go do literally anything else.
Fun fact: pot roasts like this one trace back to old-world European cooking traditions, where tougher, cheaper cuts of meat were slow-braised for hours to make them tender and flavorful — a clever way to stretch a meal that’s stuck around because, well, it just works. Give this one a try, and don’t be surprised if it becomes a regular on your dinner rotation.