1. Introduction
If you’re longing for a dish that’s effortless and flavor-packed, meet your new favourite: garlic butter chicken thighs. The juicy, tender thighs soak up a rich, garlicky butter-sauce that hits all the comfort-food buttons. Compared to chicken breasts, thighs bring extra flavour and tend to stay moist even when cooking gets busy. (Our Salty Kitchen)
Whether you’re cooking for yourself or feeding friends, this dish works as a simple weeknight win or a crowd-pleaser. Let’s dive in!

2. Ingredients (serves ~4)
Here’s your shopping list with exact measurements and some recommended picks:
- 1.2 kg (about 4 large) boneless, skin-on chicken thighs (skin ON gives extra flavour; if you prefer skinless you can use that).
- 2 tbsp unsalted butter (choose good quality like Kerrygold or national‐brand)
- 1 tbsp olive oil (extra virgin)
- 6–8 cloves garlic, minced (fresh is best)
- 1 tsp Italian seasoning (or a mix of dried thyme, oregano & rosemary)
- ½ tsp paprika
- ½ tsp garlic powder
- ¼ tsp ground black pepper
- ½ tsp kosher salt (adjust to taste/size of thighs)
- ¼ cup (60 ml) chicken broth (low sodium ideally)
- 2 tbsp lemon juice, freshly squeezed
- 2 tbsp fresh parsley, chopped (for garnish)
- Optional: ½ cup (120 ml) dry white wine (for pan sauce) — if you like, or you can skip and use extra broth/lemon. (Our Salty Kitchen)
Tip: If you live in India (Lucknow etc), you might replace the olive oil with a light vegetable oil and maybe buy a good butter brand available locally.
3. Essential Kitchen Tools & Appliances
Before you begin, get these handy:
- Essential Kitchen Tools & Appliances
- Large oven-safe skillet, e.g., 12″ cast iron
- Kitchen tongs
- Chef’s knife & cutting board set
- Measuring spoons & cups set
- Small mixing bowl
- Instant-read meat thermometer, e.g., ThermoPro TP03B
- Spatula or wooden spoon
- Oven (you already have) or stovetop with lid (mention if lid needed)
- Serving platter or plates
Having everything ready means smoother cooking and less stress.
4. Preparation Steps
Let’s break it down nice and easy:
- Trim the thighs: Pat the chicken thighs dry with paper towel. If there are large fat deposits, trim them away so you get crisp skin and uniform cooking. (Our Salty Kitchen)
- Season the chicken: In a small bowl combine Italian seasoning, paprika, garlic powder, salt and pepper. Rub this mix evenly on both sides of each thigh.
- Mince the garlic and chop the parsley; set aside.
- Preheat skillet: Place your skillet over medium-high heat. Add olive oil and swirl until shimmering.
- Warm up oven (if finishing in oven): Preheat to 200 °C (≈ 400 °F) if you’ll transfer to oven.
- Have all sauce ingredients ready: butter, chicken broth, lemon juice (and wine if using). That way once you remove chicken you can move quickly.
5. Cooking Instructions
Here’s how to transform ingredients into that luscious dish:
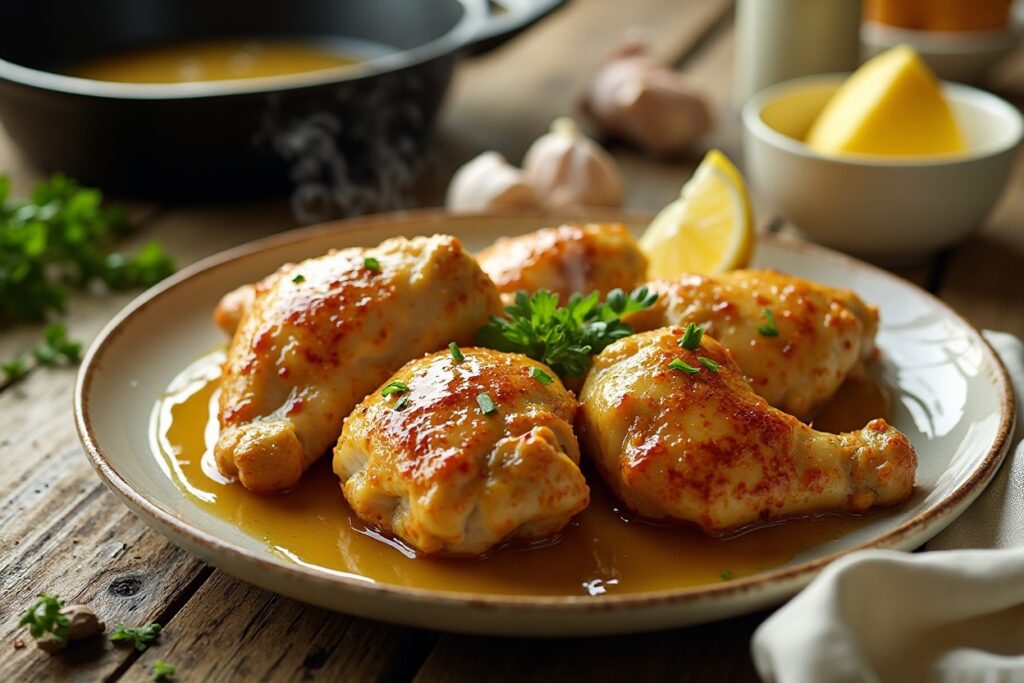
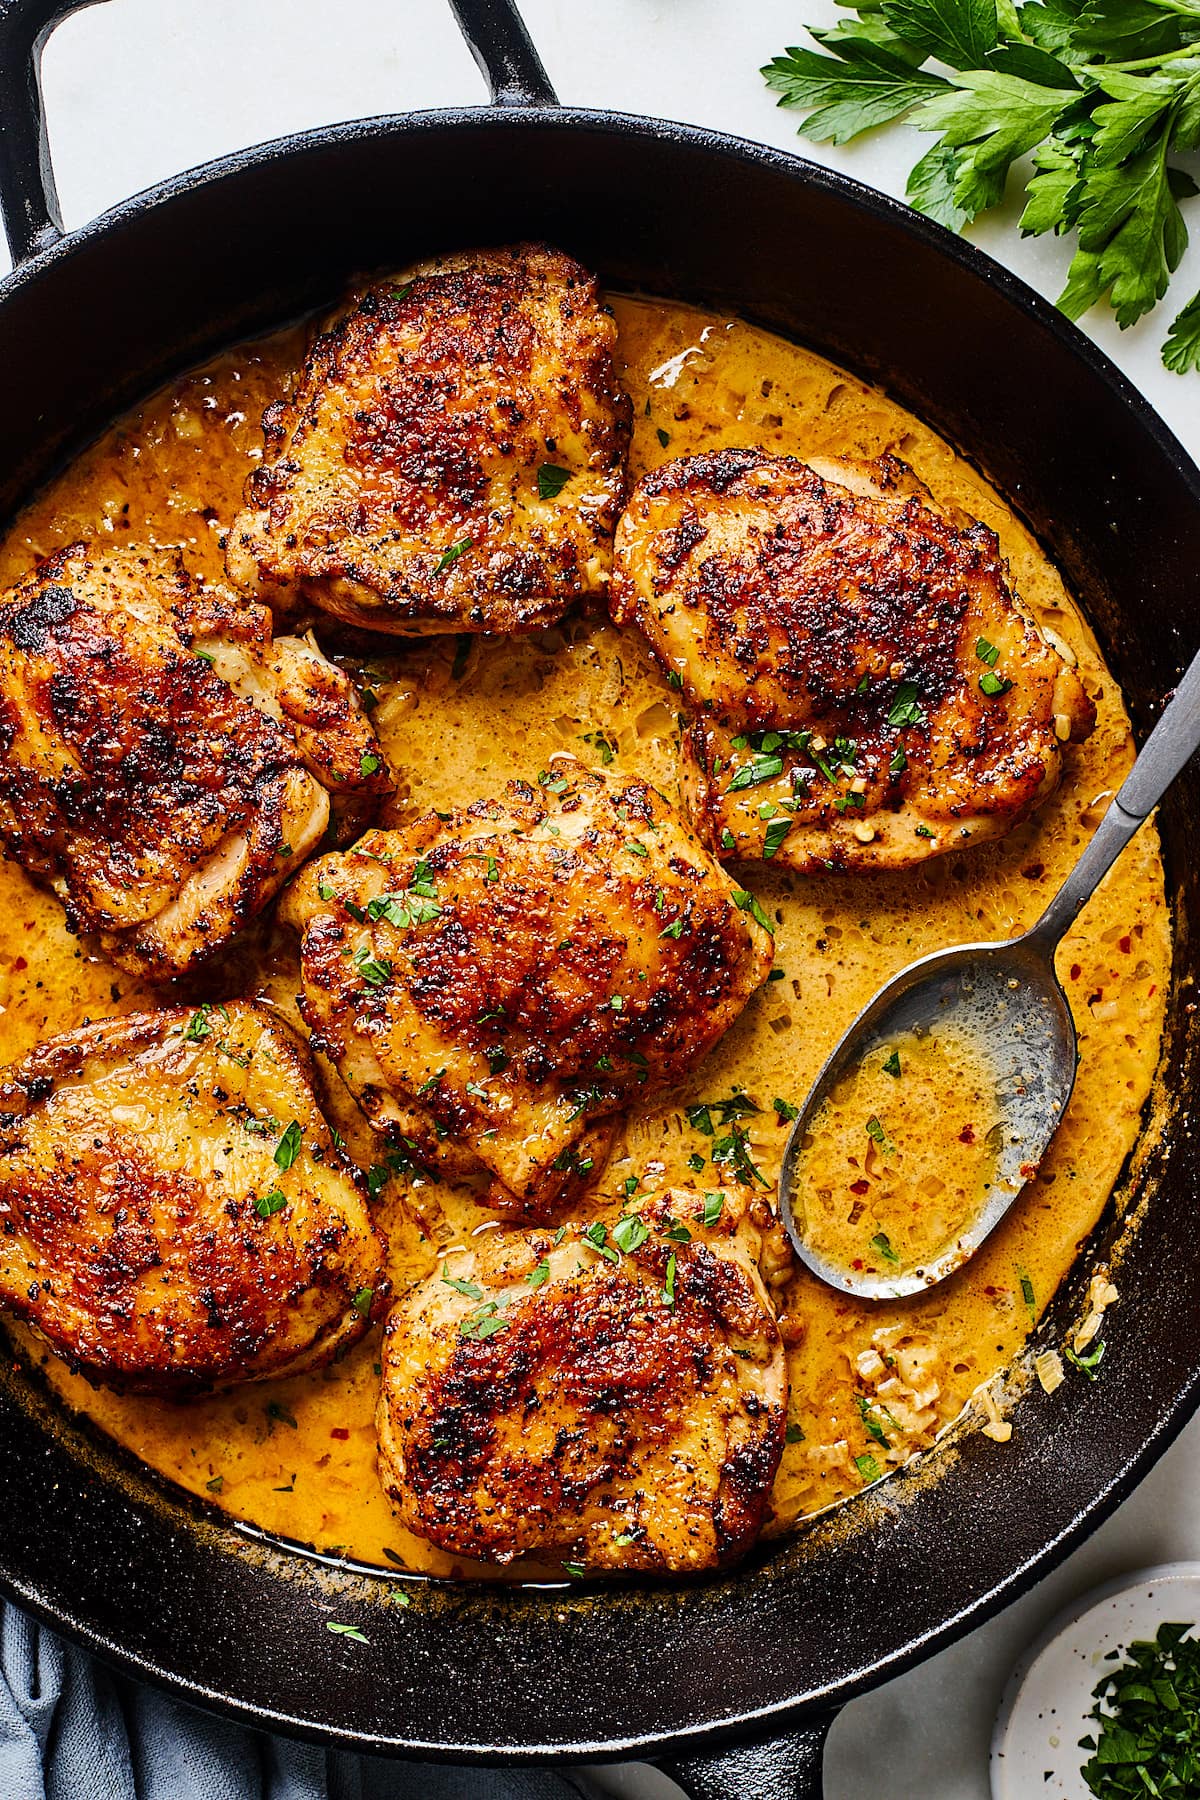
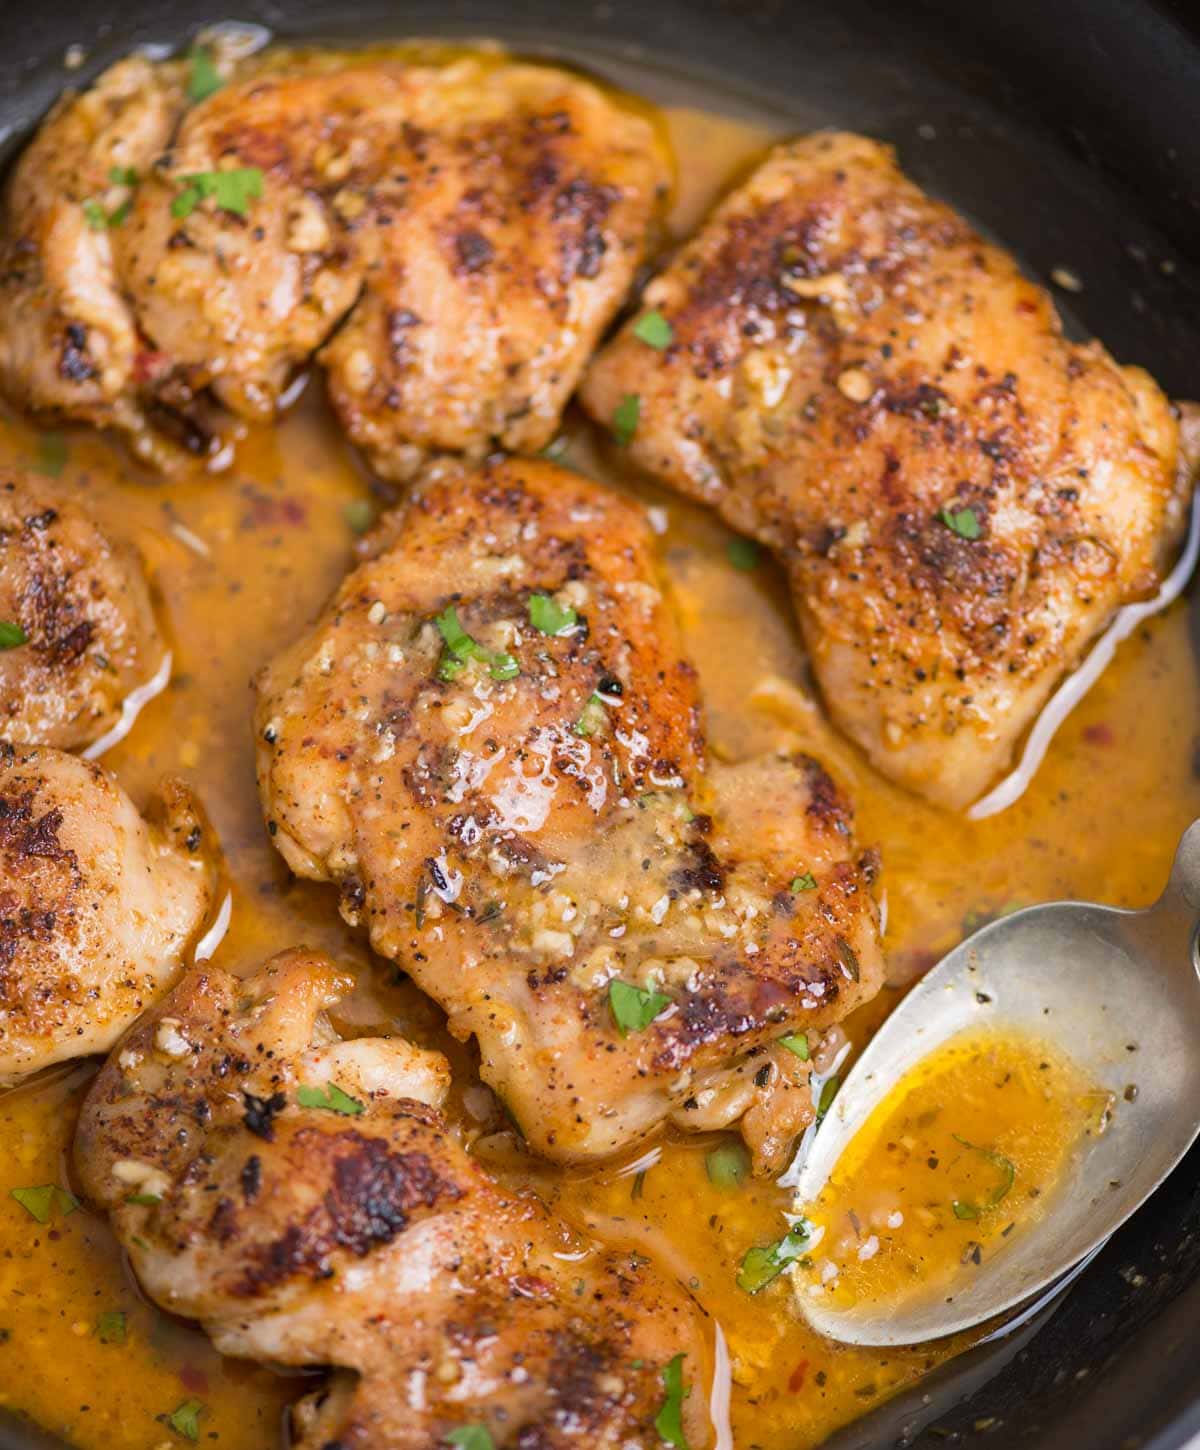
- Sear the chicken: Place the seasoned thighs skin-side down in the hot skillet (careful of oil splatter). Cook undisturbed ~4–5 minutes until skin is golden brown and crisp. Flip and cook other side ~3–4 minutes until browned. (Our Salty Kitchen)
- Remove chicken: Transfer the thighs to a plate temporarily; leave the skillet on heat.
- Make the pan sauce:
- Lower heat to medium.
- Add the butter; once melted, add minced garlic and sauté ~30s-1 minute until fragrant (don’t burn it!).
- If using wine: pour in wine to deglaze the pan, scrape brown bits, simmer until reduced by half. (If no wine, skip this step). (Our Salty Kitchen)
- Add chicken broth + lemon juice, stir and bring to simmer.
- Return chicken to skillet: Nestle thighs back into the sauce, skin-side up.
- Finish cooking:
- If using oven: Place the skillet into the pre-heated oven and bake for ~10-12 minutes (or until internal temperature reaches 74 °C / 165 °F).
- If finishing on stovetop: Cover pan, reduce heat to medium-low, simmer ~8-10 minutes until cooked through.
- Baste & rest: Spoon some sauce over the thighs whilst cooking. After done, remove from heat and let rest ~2-3 minutes. This helps juices redistribute. (Primavera Kitchen)
- Garnish & serve: Sprinkle chopped parsley over the top.
Secret tips:
- Ensure skillet is hot before chicken goes in so you get a good sear.
- Use cold butter when making sauce (some recipes emphasise it helps emulsify sauce). (Our Salty Kitchen)
- If skin starts getting too dark, reduce heat a little or transfer to oven sooner.
- Don’t overcrowd the pan; leave space between thighs for even browning.
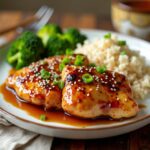
6. Serving Suggestions
Once cooked, here’s how to present and what to pair it with:
- Serve the chicken on a bed of plain steamed rice or mashed potatoes to soak up that garlic-butter sauce.
- For a lighter side: steamed green beans, asparagus, or a crisp garden salad. (wellnessresolutions.com)
- Garnish with fresh parsley and a lemon wedge on the side for extra zing.
- You could drizzle some extra sauce from the skillet over the chicken and sides – don’t waste it, it’s flavour gold.
- For extra crunch: place the thighs under the broiler for 1-2 minutes at the end (skin side up) to crisp it further.
7. Additional Tips & Tweaks
- For dietary adaptations:
- Want lighter? Use skinless thighs and reduce butter slightly, swap some butter for chicken broth or olive oil.
- Make it gluten-free: ensure your chicken broth is gluten-free certified.
- Keto-friendly: Pair with cauliflower mash/roasted veggies and skip the rice/potatoes. Nutrition data shows a version with very low carbs. (Fit Meals Prep LLC)
- Flavor boosters:
- Add a sprinkle of crushed red pepper flakes when sautéing garlic for a mild heat.
- Swap parsley for fresh thyme or rosemary for herb variation.
- After cooking, top with shaved Parmesan for a cheesy finish.
- Make-ahead: You can season the chicken and refrigerate for an hour ahead, then cook as per directions (good for dinner prep).
- Leftovers: Store in airtight container and reheat gently to avoid drying out.
8. Nutrition Details (Approximate per serving)
Here’s a table for one serving (¼ of recipe, using skin-on thighs, butter as written):
| Nutrient | Amount |
|---|---|
| Calories | ~430 kcal* |
| Protein | ~35 g |
| Total Carbohydrates | ~2–4 g |
| Dietary Fibre | ~0.5 g |
| Sugars | ~1 g |
| Total Fat | ~26 g |
| Saturated Fat | ~9 g |
| Sodium | ~310 mg |
| Cholesterol | ~220 mg |
*Based on a similar published version: 431 kcal, fat 24g, saturated 9g, protein 45g for one serving. (Our Salty Kitchen)
Actual values will vary with the size of thighs, skin vs no skin, exact butter/oil, sides served.
9. FAQ Section
Q: Can I use chicken breast instead of thighs?
A: Yes — you can. However, breasts cook faster and tend to dry out more. You’ll want to pound them to even thickness and adjust cooking time. (Our Salty Kitchen)
Q: How do I store leftovers?
A: Cool the chicken, place in an airtight container and refrigerate for up to 3 days. For freezing, wrap tightly and freeze for up to 2–3 months. Reheat gently (in oven or skillet) to preserve moisture. (wellnessresolutions.com)
Q: What if I don’t have an oven-safe skillet?
A: No problem — after searing, transfer the chicken and sauce to a baking dish and proceed with the oven step. Alternately, finish entirely on stovetop with pan covered and simmer. (There’s Food at Home)
Q: Can I skip the wine?
A: Absolutely. If you don’t use wine, just increase the chicken broth or lemon juice slightly. The sauce will still be delicious. (Our Salty Kitchen)
Q: How do I know the chicken is done?
A: Use an instant-read thermometer — internal temperature should reach 74 °C (165 °F). Checking visually (clear juices, no pink) also helps. (Budget Bytes)
10. Wrap-Up
Alright Jennifer – there you have it: a friendly, detailed guide to making Garlic Butter Chicken Thighs that are juicy, flavourful and perfect for your “EatFineFood” vibe. With the rich garlic butter sauce and the savoury thighs, you’re hitting comfort and deliciousness. Give it a try this week — quick enough for a weeknight, satisfying enough for guests.
Fun fact: Chicken thighs have become “the new reliable” in home kitchens because they stay juicy and forgiving compared to breasts. (Our Salty Kitchen) So by choosing thighs, you’re making a smart flavour move.
If you like, I can also pull together printable recipe cards or a short video tutorial link you could pin on your Pinterest board. Want me to get that ready too?