1. Introduction
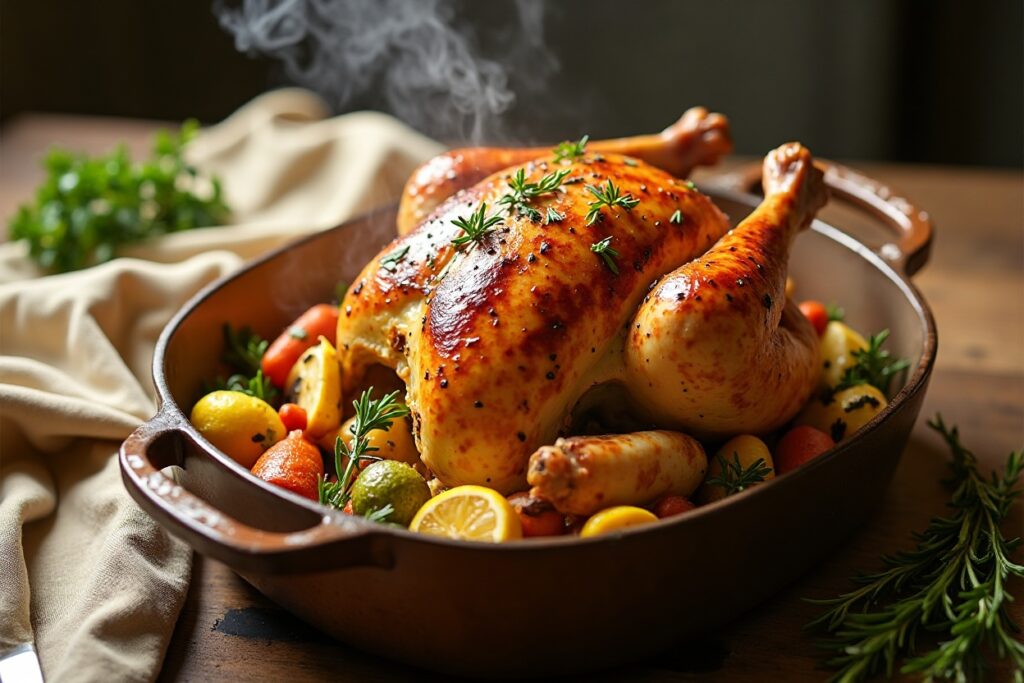
If you’re after a dish that looks the part yet feels easy, this Roasted Garlic and Herb Chicken is your new go-to. Picture a golden-crisp skin infused with fragrant garlic, fresh herbs and a hint of lemon, and tender juicy chicken that’s not over-complicated. It’s a winner because it balances comfort and elegance, works for weeknights or guests, and fills the kitchen with that irresistible roasted aroma.
2. Ingredients
Here’s your full shopping list for 4 servings (adjust quantities if needed).
- 1 whole chicken (approx 1.8–2 kg / 4 lb) – look for a good quality bird.
- 4 Tbsp (≈ 60 ml) melted unsalted butter
- 1 Tbsp (≈ 15 ml) extra-virgin olive oil
- 1 ½ tsp (≈ 8 g) kosher salt
- ½ tsp freshly ground black pepper
- 4–5 garlic cloves, minced
- 1 head of garlic, halved horizontally
- 1 Tbsp fresh thyme leaves (or 1 tsp dried)
- 1 Tbsp fresh rosemary, chopped (or 1 tsp dried)
- 2 Tbsp fresh parsley, chopped (for finishing, optional)
- 1 large lemon, halved (juice one half, roast the other half)
- Optional: ½ yellow onion, quartered (to stuff the cavity or roast alongside)
- Optional vegetable sides (if roasting together): 300 g baby potatoes, 200 g carrots, 200 g zucchini — tossed in olive oil, salt & pepper.
3. Essential Kitchen Tools & Appliances
Before you start, make sure you have:
- Roasting pan or large baking dish
- Oven (preheated to the specified temperature)
- Digital meat thermometer (highly recommended)
- Chef’s knife + cutting board
- Kitchen twine (for trussing, optional but useful)
- Paper towels (to pat dry the chicken)
- Mixing bowl set
- Basting brush (or use clean hands)
- Kitchen tongs or spatula
- Aluminium foil (to cover the chicken while resting)
- Carving knife & serving platter
4. Preparation Steps (Barney-style)
Here’s how you prep everything step by step:
- Pre-prep: Preheat your oven to 200 °C / 400 °F.
- Clean & dry chicken: Remove the chicken from packaging, discard giblets if present. Pat the chicken inside and out with paper towels – a dry surface helps crisp the skin.
- Season inside: Season the cavity with a little salt & pepper.
- Herb butter/oil mix: In your mixing bowl, melt the butter or measure the olive oil. Add the minced garlic, thyme, rosemary, parsley (if using), salt & pepper. Mix well.
- Rub the chicken: Use your hands (or a brush) to lift the skin gently (especially over the breast) and rub some of the butter/herb mixture underneath the skin. Then rub the rest all over the outside of the chicken. This ensures flavour into the meat and under the skin.
- Stuff/arrange cavity: Place the halved head of garlic and the halved lemon inside the cavity of the chicken. If using onion quarters, add them too. This helps aromatic roasting.
- Truss (optional): Tie the legs together with kitchen twine to help the chicken roast evenly and hold its shape.
- Arrange in roasting pan: Place the chicken breast-side up in your roasting pan. If doing veggies, toss potatoes/carrots/zucchini with a little olive oil, salt & pepper and arrange around the chicken.
- Last check: Make sure your meat thermometer is ready (insert into the thickest part of the thigh but not touching bone).
- Start roasting: Transfer to the oven.
5. Cooking / Baking Instructions
Here’s the cooking process complete with timing, temperature, and secret tips to nail it.
- Roast at 200 °C / 400 °F for approx 60-75 minutes (for ~1.8-2 kg / 4 lb whole chicken).
- Halfway through (~30-35 minutes in), you can baste the chicken with the juices collected in the pan and/or rotate the pan 180° to promote even browning.
- The chicken is done when the internal temperature in the thickest part of the thigh (without touching bone) reads 74 °C / 165 °F. Alternatively, the juices should run clear when you cut between the leg and thigh.
- Once out of oven, let the chicken rest for about 10-15 minutes (loosely covered with foil). This allows the juices to redistribute and ensures meat remains moist.
- Secret tips:
- Patting dry the skin upfront ensures crispiness (the less surface moisture, the crispier the skin).
- Getting some of the herb Butter/oil mixture under the skin boosts flavour right at the meat-skin interface.
- If you want ultra-crisp skin, you can broil (grill) the chicken for the last 2-3 minutes of roasting, watching carefully so it doesn’t burn.
- If you have a convection oven, you might reduce temp slightly or reduce time by ~5-10 minutes.
6. Serving Suggestions
Once your roasted garlic and herb chicken is beautifully cooked, here’s how to present and serve it:
- Carve the chicken into breast slices, leg/thigh portions, wings if desired. Arrange on a large platter.
- Pour some of the pan-juices over the carved chicken for moisture and flavour.
- Garnish with fresh chopped parsley and some lemon wedges (use the roasted lemon halves – squeeze them over the chicken for a fresh citrus hit).
- Side dish ideas:
- Roasted baby potatoes or garlic mashed potatoes
- Sautéed green beans or steamed asparagus
- A crisp salad — for instance a mixed greens salad with vinaigrette to cut through the richness
- Roasted vegetables (if you tossed them in the same pan, easy!)
- Serving vibe: This dish works for a cozy family dinner or a casual dinner party. Pair with a chilled white wine (if you drink) or sparkling water with lemon for a non-alcoholic option.
7. Additional Tips
- Flavor boosters: Add a pinch of smoked paprika or a little cayenne if you like a gentle heat. Try finishing with a swirl of herbed compound butter (mix butter + chopped parsley + lemon zest) after roasting.
- Dietary tweaks:
- Make it lower-fat: Use olive oil instead of butter, and remove some skin if desired.
- Make it gluten-free: This recipe is naturally gluten-free.
- Make it keto-friendly: With minimal carbs, this fits nicely. (Note side dishes accordingly)
- Make-ahead: You can rub the chicken with the herb butter one day ahead, leaving it uncovered in the fridge. The dry-brine effect helps flavour and crisp skin.
- Leftover usage: Shred leftover meat for sandwiches, salads or wraps. Save bones to make homemade chicken stock.
8. Nutrition Details
Here’s an approximate breakdown per serving (assuming whole chicken yields 4 servings, without heavy sides).
| Nutrient | Per Serving |
|---|---|
| Calories | ~500 kcal |
| Protein | ~35-40 g |
| Total Carbohydrates | ~5-8 g |
| Dietary Fiber | ~1 g |
| Total Fat | ~30-35 g |
| Saturated Fat | ~10-12 g |
| Cholesterol | ~150-170 mg |
| Sodium | ~750-800 mg |
Note: If you serve heavy sides (potatoes, creamy mash), or use more butter/oil, adjust accordingly.
9. FAQ Section
Q: How do I store leftovers?
A: Cool the chicken to room-temperature (but don’t leave out more than ~2 hours). Remove meat from any bones, store in an airtight container in the fridge for up to 3–4 days.
Q: Can I substitute chicken breasts only instead of whole chicken?
A: Yes — you can use skin-on, bone-in breasts or thighs. Adjust cooking time (likely shorter) and check internal temperature (74 °C / 165 °F). Note you won’t get the same flavour from the cavity stuffing.
Q: What if I don’t have fresh herbs?
A: Use dried herbs instead — about ⅓ the quantity of fresh. Example: 1 tsp dried thyme instead of 1 Tbsp fresh. The flavour will still be good.
Q: How can I make the skin extra crispy?
A: Pat chicken really dry; leave uncovered in the fridge for an hour or more before roasting to help dryness; baste during roasting; finish under broiler for 2–3 minutes.
Q: Can I roast it at a lower temperature for longer?
A: Yes, you could do 180 °C / 350 °F and roast for ~90 minutes, but the higher-temp method (200 °C) gives better browning and crisp skin in less time.
10. Wrap-Up
In short: this Roasted Garlic and Herb Chicken hits all the right notes — juicy, flavour-rich, aromatic, and deceptively simple. You’ll impress yourself and anyone at the table with minimal fuss. The garlic and fresh herbs elevate the dish, the roasting process does the heavy lifting, and you’ll get delicious leftovers too.
Fun fact/story: Roasting whole chickens with garlic and herbs is a timeless method found in many cuisines — the garlic infuses deep into the meat, the herbs bring freshness, and the whole bird format makes it feel special yet homey. One popular recipe notes that “once you get past handling the raw chicken, it’s really easy… the skin gets crispy, the meat stays juicy, and the kitchen smells amazing!”
So get your tools ready, pick up your ingredients (via the links!), and enjoy the process — you’re about to create something delicious. Let me know how it turns out (and if you want side-dish ideas, just say the word!).