
1. Introduction
Okay, real talk — roasting a whole chicken used to feel like a Sunday-only project. You’d preheat the oven forever, wait almost two hours, and still end up second-guessing whether the inside was fully cooked. This air fryer version fixes basically every one of those headaches.
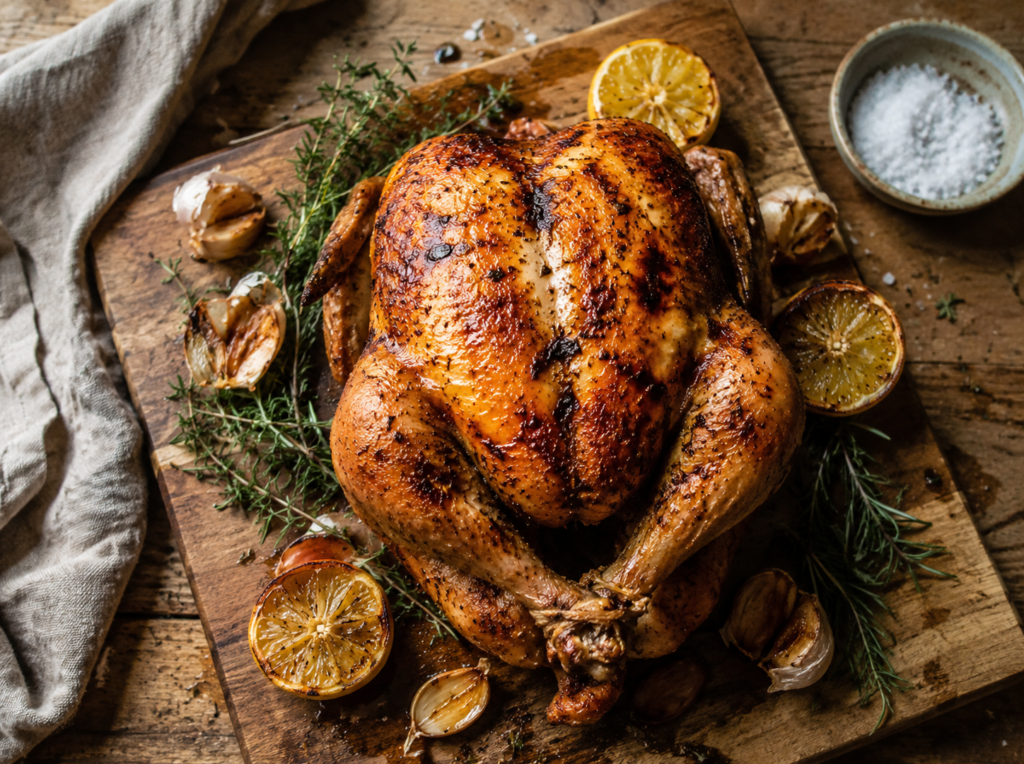
You’re looking at crackly, deeply golden skin on the outside and juicy, tender meat underneath, and the whole thing is done in under an hour. No flipping the bird around, no basting every 20 minutes, no giant oven heating up your whole kitchen in July. Just rub it, season it, and let the air fryer do the heavy lifting.
It’s the kind of recipe that looks like you spent hours on it but actually took about 10 minutes of hands-on work. Perfect for a weeknight when you want something that feels special, or a lazy Sunday when you don’t want to babysit an oven all afternoon.
2. Ingredients
Here’s everything you’ll need. This recipe is built for a 4-5 pound whole chicken, which fits most standard air fryer baskets (check your air fryer’s capacity if you’re not sure).
- 1 whole chicken (4-5 lbs) — patted completely dry, giblets removed
- 3 tbsp olive oil — extra virgin works best for flavor
- 1 tbsp kosher salt — Diamond Crystal or Morton both work, just adjust if using fine table salt (use less)
- 1 tsp black pepper — freshly cracked if you can
- 1 tbsp garlic powder
- 1 tbsp smoked paprika — this is what gives that gorgeous color
- 1 tsp onion powder
- 1 tsp dried thyme — or 3-4 sprigs fresh thyme
- 1/2 tsp dried rosemary — or 2 sprigs fresh
- 1 lemon — halved
- 4-5 cloves garlic — smashed, skin on is fine
- 2 tbsp unsalted butter — softened (optional, but adds richness under the skin)
- 1 small onion — quartered (optional, for extra flavor while cooking)
Shopping tip: Grab a chicken that’s as close to your air fryer basket size as possible. A Perdue or Bell & Evans chicken tends to have good size consistency if you want a reliable pick, but honestly any fresh whole chicken from your grocery store will work fine.
3. Essential Kitchen Tools & Appliances
Nothing fancy here — that’s the beauty of this recipe.
- Air fryer (basket-style, at least 5.5-6 quart capacity for a whole chicken)
- Meat thermometer — this one is non-negotiable if you want perfectly cooked chicken every time
- Kitchen shears or a sharp chef’s knife — for trussing or trimming
- Paper towels — for patting the chicken dry
- Small mixing bowl — to combine your spice rub
- Kitchen twine — optional, for trussing the legs together
- Tongs — for safely handling the hot chicken
- Cutting board — for resting and carving
4. Cooking Timing and Preparation Steps
Let’s break this down step by step so nothing feels overwhelming.
- Pat the chicken completely dry. Use paper towels and really get in there, inside and out. This is the secret to crispy skin — any moisture left behind steams instead of crisps.
- Let it sit at room temp for 20-30 minutes. Cold chicken straight from the fridge cooks unevenly. A short rest on the counter helps it cook more consistently.
- Mix your spice rub. In a small bowl, combine the salt, pepper, garlic powder, smoked paprika, onion powder, thyme, and rosemary.
- Loosen the skin. Gently slide your fingers between the skin and the breast meat to create a little pocket, being careful not to tear it. If using butter, rub some of it directly onto the meat under the skin.
- Oil it up. Rub the olive oil all over the outside of the chicken, making sure every inch is coated.
- Season generously. Sprinkle and pat the spice mix all over the outside and even a little inside the cavity.
- Stuff the cavity. Place the halved lemon, smashed garlic cloves, and quartered onion inside the chicken’s cavity.
- Truss if you’d like. Tie the legs together with kitchen twine for more even cooking (not required, but it helps).
Total prep time: about 15-20 minutes, plus that 20-30 minute room-temp rest.
5. Cooking/Baking Instructions
Now for the fun part.
- Preheat your air fryer to 360°F for about 5 minutes.
- Place the chicken breast-side down in the air fryer basket. Starting breast-side down helps keep the breast meat juicy since it’s protected from the direct heat first.
- Cook at 360°F for 30 minutes.
- Flip the chicken breast-side up using tongs (and maybe a second pair of hands or a spatula for support — it’ll be hot and a little wobbly).
- Cook for another 20-25 minutes at 360°F, or until the skin is deep golden brown and crispy.
- Check the internal temperature. Insert your meat thermometer into the thickest part of the thigh, avoiding the bone. You’re looking for 165°F. If it’s not there yet, keep cooking in 5-minute increments and checking again.
- Rest the chicken for 10-15 minutes before carving. This is genuinely important — cutting too soon lets all the juices run out onto your cutting board instead of staying in the meat.
Insider tip: If the skin is browning too fast before the inside is fully cooked, loosely tent it with a small piece of foil for the remaining cook time.
6. Serving Suggestions
Once it’s rested and carved, here’s how to make it feel like a full meal.
- Serve it whole on a platter with the roasted lemon and garlic from the cavity scattered around for a beautiful presentation.
- A simple side of roasted or mashed potatoes soaks up all those flavorful juices perfectly.
- A crisp green salad with a light vinaigrette balances out the richness.
- Garnish with fresh chopped parsley or extra thyme sprigs for a pop of color.
- Squeeze some of that roasted lemon over the carved meat right before serving — it wakes everything up.
- Pair with warm crusty bread to mop up the pan drippings.
7. Additional Tips
- Want extra crispy skin? Air dry the chicken uncovered in the fridge for a few hours (or overnight) before cooking. This pulls out extra moisture from the skin.
- Low sodium? Cut the salt in half and lean more on the herbs and smoked paprika for flavor.
- Dairy-free? Skip the butter under the skin — the olive oil alone still gives great results.
- Want a smokier flavor? Add a pinch of cayenne or chipotle powder to the spice rub.
- Different herbs work too — swap thyme and rosemary for Italian seasoning or herbes de Provence if that’s what you have on hand.
- Save the carcass! Once you’ve carved off the meat, toss the bones into a pot with water, onion scraps, and carrot ends for a quick homemade stock.
8. Nutrition Details
Approximate values per serving (based on 6 servings per chicken, skin-on)
| Nutrient | Amount |
|---|---|
| Calories | 380 kcal |
| Protein | 34g |
| Total Fat | 26g |
| Saturated Fat | 7g |
| Carbohydrates | 1g |
| Fiber | 0g |
| Sugar | 0g |
| Sodium | 620mg |
| Cholesterol | 130mg |
Note: values are estimates and will vary based on exact chicken size, added butter, and portion sizes.
9. FAQ Section
Can I use a frozen chicken? It’s best to fully thaw your chicken first, either in the fridge over 1-2 days or using the cold water method. Cooking from frozen leads to uneven results in an air fryer.
How do I store leftovers? Store carved chicken in an airtight container in the fridge for up to 4 days. It also freezes well for up to 3 months.
Can I make this healthier? Remove the skin before eating to cut down on fat, or use just a light spray of oil instead of the full 3 tablespoons before air frying.
My air fryer basket is too small for a whole chicken. What do I do? Go with a smaller chicken (around 3-3.5 lbs) or spatchcock it (remove the backbone and flatten it) so it fits and cooks even faster.
Why did my skin turn out soggy instead of crispy? Usually this means the chicken wasn’t dried thoroughly enough before seasoning, or the air fryer basket was overcrowded, trapping steam.
10. Wrap-Up
And that’s it — a full, juicy, golden roast chicken with barely any effort, all thanks to your air fryer. It’s proof that you don’t need hours in the kitchen or a fancy technique to pull off a meal that feels like a warm hug on a plate.
Fun fact: roast chicken has long been considered the ultimate test of a home cook’s skill in professional kitchens — it’s simple in theory but easy to mess up. Nailing a perfectly juicy, crispy-skinned bird is basically a rite of passage. So really, by making this, you’re leveling up your kitchen game one crispy drumstick at a time. Enjoy!